
How to design car audio system for Highlander of Toyota
According to the survey, Highlander's original car was equipped with only six loudspeakers (the front door has two treble speakers and two bass speakers, and the back door has two coaxial loudspeakers).
Due to the cost limitation, the sound system of most original cars is a simple combination of sound source (head unit) and speaker. The audio source of the original car has very small power, poor audio sampling accuracy and resolution, large harmonic distortion and low signal-to-noise ratio, which can easily cause Music replay distortion. The sound system configured in the original car can't show high-quality music effects.

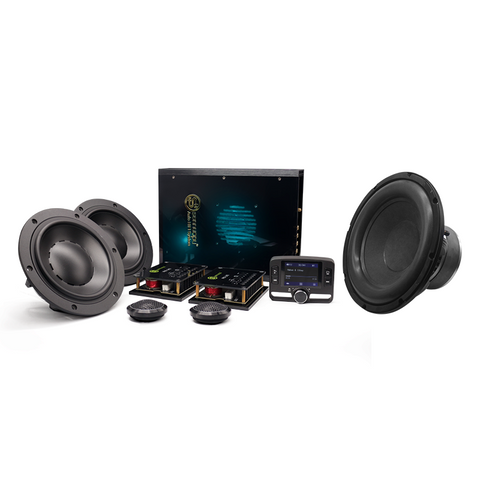
Recommended Solution 1: Active system design

Reason for recommendation: the division of three-frequency division is clearer, which is bound to have a better sense of hierarchy than the two-frequency division of the same level. And the sound density is higher. For active design, HIFI-X12 can be used to change the parameters of each channel separately, which has a high degree of freedom and can be adjusted arbitrarily, phase, delay, EQ equilibrium and so on for the three units. If you are pursuing the true sound quality in the car, please upgrade your car's three-way front-level system. Once installed and calibrated, the result will be amazing!
Processor: DSP amplifier: HIFI X12(8-channel power amplifier with 10-channel DSP)
Front sound field: 3 way Speaker: SK8
Rear sound field: 2 Way Speaker: P65
Subwoofer: Active Subwoofer: T6 Bass
Sound insulation project: four doors and two layers sound insulation
The construction of the active sound system project begins: wiring according to the design drawing
Step 1: The door panel needs sound insulation and noise reduction.

Step 2: install a set of SK-8 three-way loudspeaker in the front sound field, install the midrange unit on both sides of the dashboard, and fix it with a bracket. The treble is installed on the-pillar, and the mid-bass is installed on the front door panel without damage. The washer is fixed to prevent it from falling
Step 3: Install a set of P65 bidirectional speaker in the rear sound field. The treble speaker is installed on the top of the back door and needs to be opened. The Middle Bass is installed in the original position of the back door panel. Clear and powerful voice


Step 4: connect DSP power amplifier to speaker:
CH1/2 --- front door high pitch,
CH3/4 -- front door midrange,
CH5/6 -- front door bass,
CH7/8 -- back door 2-way speaker combination;
CH9/10--T6 Bass
Step 5: start debugging, use PC to open the tuning software, and use data cable to connect PC with DSP. Set the frequency of each channel. HIFI X12 has the function of automatic frequency switching. 1: Check whether the HIFI-X12 is powered on and whether the startup mode is correct. There are two startup modes: ACC and HIGH. In addition, only the 4GA power cord model can be used for normal power supply.
2: Use data cables and connect the PC to the DSPHIFI-X12.
3: confirm the electric phase of the loudspeaker, and test whether the opposite position of the speaker on each road is correct.
4: active-loudspeaker frequency division point tangent point confirmation,
5: confirmation of intonation and pitch.: confirm the intonation and pitch, and achieve accurate positioning of sound field by adjusting the delay of each loudspeaker.
6: Balance of left and right channels


Recommended Solution 2: passive system design


Recommended reason: lossless upgrade of two-way loudspeaker, special wiring harness for special car, plug and play,
Through the highest power output of X680 to P65(2-channel loudspeaker with distributor), you will hear creepy music details and the music with the most accurate sound reproduction.
X680 built-in power 6*110W power amplifier, with enough energy to push P65 (2-way loudspeaker), 5, 6 channels can Bridge to push 450W bass speaker.
Easy Plug and Play, non-destructive installation.
Processor: DSP amplifier: X680 (6-channel power amplifier with 8-channel DSP)
Front sound field: 2 Way Speaker: P65
Rear sound field: 2 Way Speaker: P65
Subwoofer: passive subwoofer: special car 10 inch Bass
Sound insulation project: four doors and two layers sound insulation
Construction of passive sound system project begins: wiring according to design drawing
Step 1: The door panel needs sound insulation and noise reduction.
Step 2: install a set of P65 two-way loudspeaker in the front sound field, install the treble unit on both sides of the dashboard, and fix it with a bracket. The mid-bass is installed on the front door panel without damage, and the washer is fixed to prevent it from falling.
Step 3: Install a set of P65 two-way loudspeaker in the rear sound field. The treble speaker is installed on the top of the back door and needs to be opened. The Middle Bass is installed in the original position of the back door panel. Clear and powerful voice
Step 4: DSP power amplifier and speaker connection:
CH1---FL front door 2-way speaker--with distributor
CH2---FR front door 2-way speaker--with distributor
CH3---RR rear door 2-way speaker--with distributor
CH4---RL rear door 2-way speaker--with distributor
CH5/6--Passive subwoofer: 10 inch Bass for special car

Step 5: start debugging, use PC to open the tuning software, and use data cable to connect PC with DSP. Set the frequency of each channel. X680 1: Check whether X680 is powered on and whether the startup mode is correct. There are two startup modes: ACC and HIGH. In addition, only the 4GA power cord model can be used for normal power supply.
2: Use data cable and connect PC to DSPX680.
3: confirm the electric phase of the loudspeaker, and test whether the opposite position of the loudspeaker on each road is correct.
4: Passive-loudspeaker frequency division point tangent point confirmation,
5: confirm the intonation and tone, and adjust the delay of each loudspeaker to achieve accurate positioning of sound field.
6: Balance of left and right channels
